How to Classify Emails with AI and Automation
As more and more enterprises are realizing the benefits of using robots to automate mundane tasks, equally many are looking to scale their efforts with AI capabilities. AI enabled automation allows businesses to not only transfer data faster but also to interpret that data, making the entire process smarter and more efficient.
One use case for this is automation of email classification.
Replying to emails or messages in a timely fashion with limited resources at hand can be a challenge. By using robots and cognitive services, however, classification of emails can be automated, allowing faster and better customer responses.
What you need to get started
To classify emails with AI automation, you need three things:
- The Leapwork automation software – request a trial version
- A LUIS cognitive service account – get a trial
- An email account – you can use any of the web-based email providers (we are going to use Google's mail service in this guide)
The outcome should be a robot that monitors your email, understands the context of the email body, and places the email into the appropriate email folder/inbox/team.
Watch the video to see how it works, or follow the step-by-step guide below to try it yourself.
Step 1: Configure email inbox
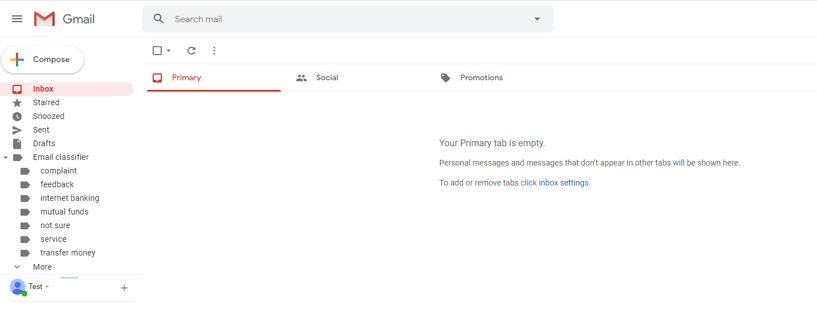
The first step is to create a folder and all the underlying subfolders corresponding to the various topics that you want to track
Step 2: Create your smart classifier on luis.ai
Next, open your Luis cognitive services account and create a new application.
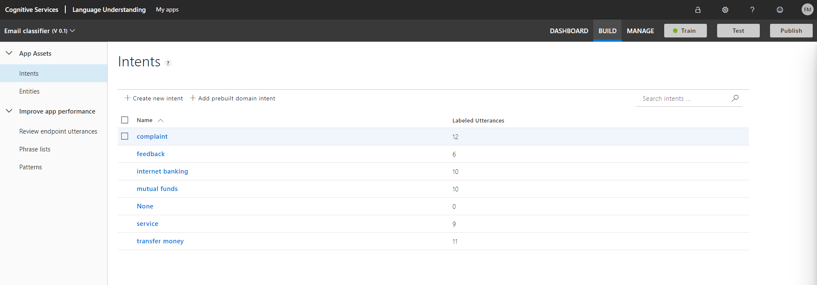
 Within your application, create your intents so that they correspond to the folders that you have defined in your email inbox.
Add utterances (examples) for each intent that you want tracked.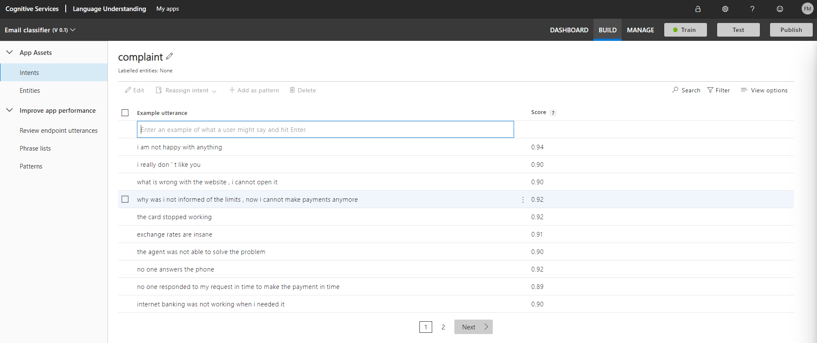
Click Train. This will trigger the training of the underlying algorithm using the data you have provides so far.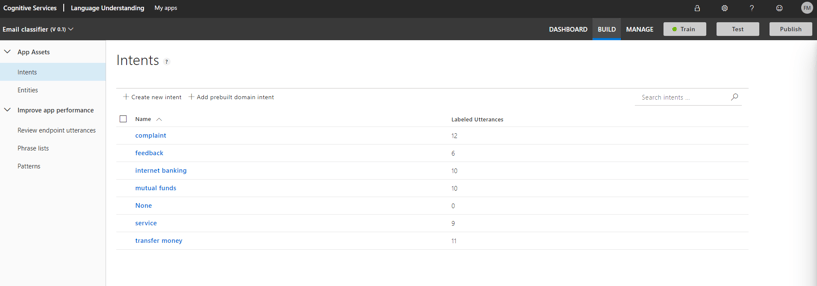
Click Publish. Now you will be able to expose the application as a web service to the outside, which will mean you can send the text to it via REST API calls.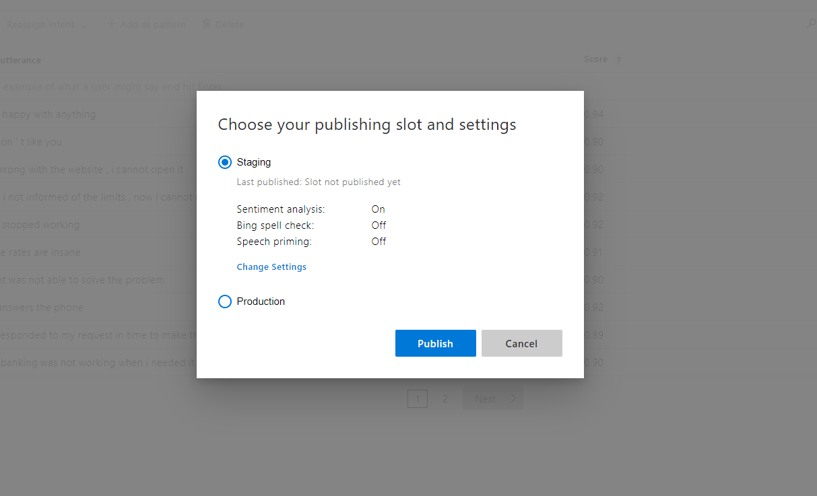
Get the application details and save them. You will need them once you have built your automation flow.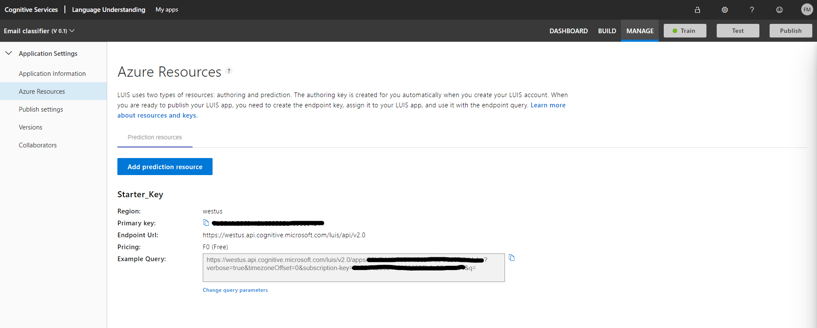
Step 3: Create your automation workflow using Leapwork
First, set up a flow like the one below that automates the log-in to your email account.
Once you have logged in, you can go through the list of emails that you have in your inbox.
For each email, it will read the text in the body and send that to the LUIS service we created earlier (also called a REST API request).
The LUIS application gives you a good set of examples on how to create the requests. You can also see it in our flow.
The service will send us back a response. Once we check and approve that process, we can proceed.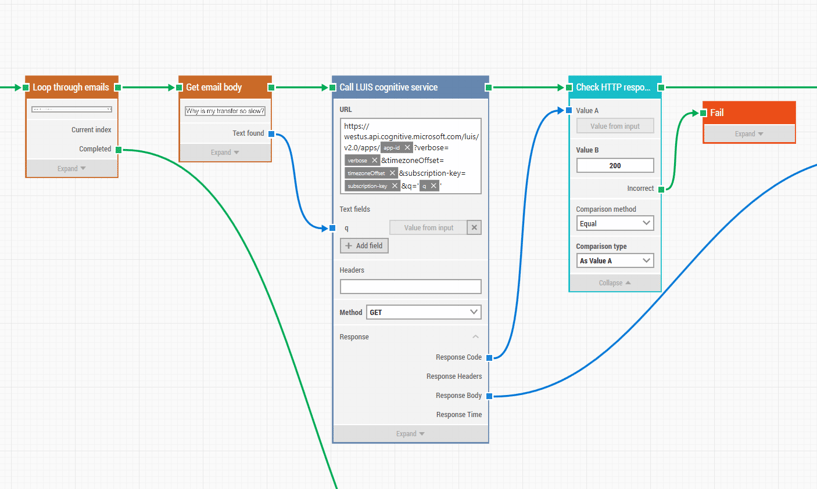
The next step will be to extract the value of interest from the response file (JSON file). Here is an example of how it looks:
"topScoringIntent":{
"intent":"internetbanking",
"score":0.400545418
What we do in the automation flow is to specify what to extract and from where. In our example, that would be “internet banking”. Once we have that, we can proceed to the next step.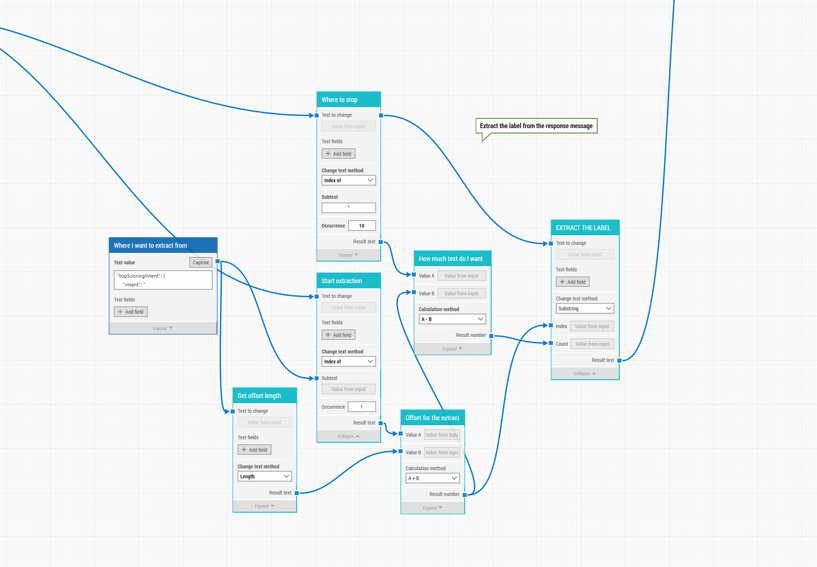
The last step in our automation flow is to move the actual email into the underlying folder that corresponds to the identified value by our LUIS application. In our example, that is the “internet banking” folder.
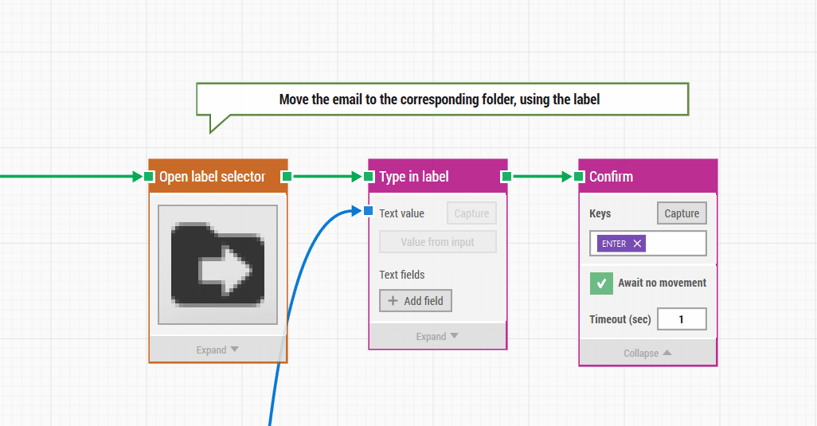 And that’s it! Now we have an automated flow that reads our emails and classifies them accordingly in the corresponding folders.
A last piece of advice is that if you want to improve the accuracy of the LUIS application, more examples for each intent will help you achieve that.
Curious to learn more about AI-enabled automation? Watch our on-demand webinar "Hyperautomation: Bringing AI and automation together".
