Blog
Read the latest blogs
Find tutorials, guides and use case examples in the
Learning centerThe Connection tab lets you set up a connection to different external resources. These resources can support powerful extensions to Leapwork, such as automation for mobile devices (locally or in the cloud) as well as external directions. Multiple connections can be created and saved which can be used for each Leapwork instance.
Leapwork supports various ways to set up a connection:
Note: Connections settings would be available if you are logged in as an administrator.
When you are creating test cases in Azure DevOps, you can maintain it using a test plan structure or individually create work items and manually try to execute those test cases. This integration allows you to automate test cases in Leapwork. The automated test cases can be executed multiple times. You can analyze execution report and view results on ADO.
For importing a test case, create connection using ADO URL and personal access token.
Note: At the moment it only supports single ADO connection. ADO connection type will not appear if you already have ADO connection configured in connection settings.
Appium Server is an open-source automation framework that is used for testing mobile applications. It drives Android and iOS app using WebDriver. The Appium server must be installed on a host that is accessible for Leapwork.
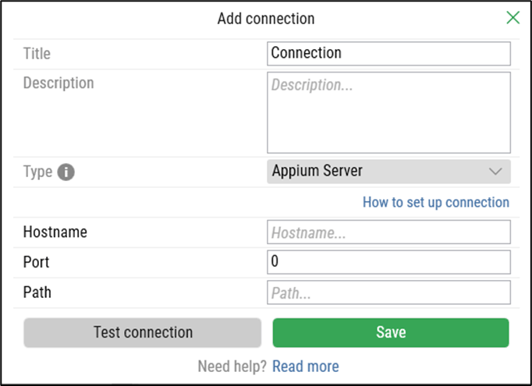
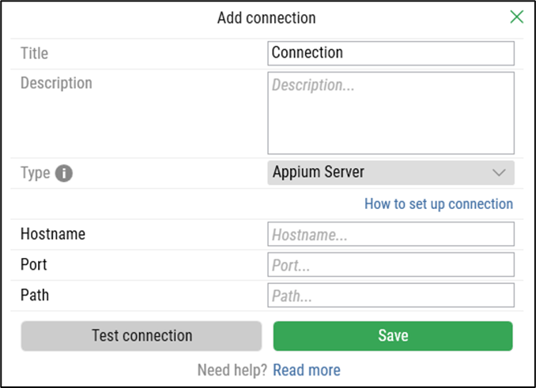
To add a connection, click the Add button and the following pop-up appears:
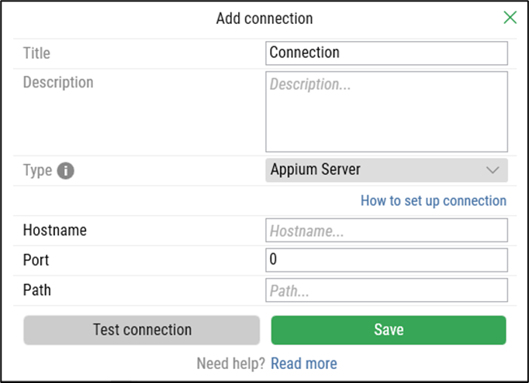
On the Add Connection pop-up window:
Enter the title of the connection in the Title field. It should be unique.
Enter the description in the Description field.
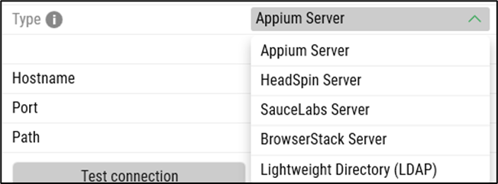
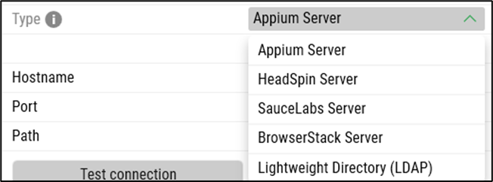
From the Type drop-down, select the Appium Server option:
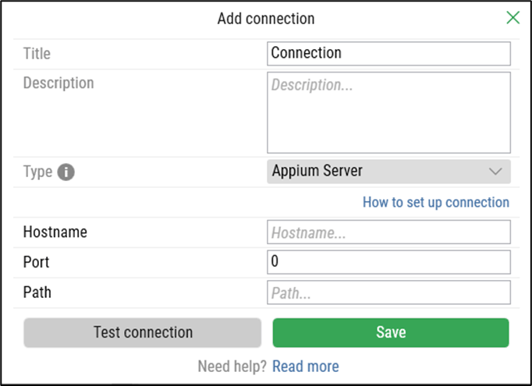
Select Appium Server and the following new fields appear:
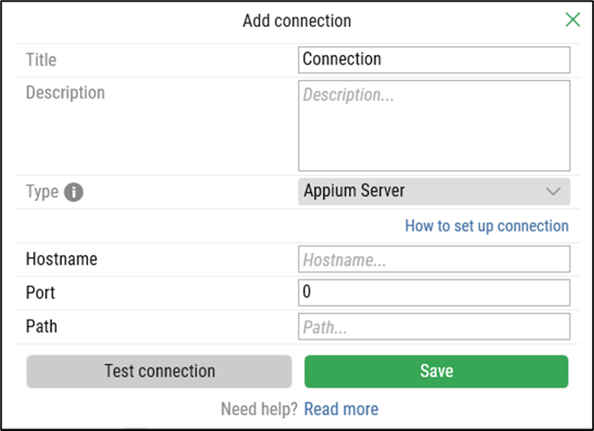
Enter Hostname in the Hostname field. The hostname refers to the host of the Appium server, and can be either:
Note: While it is possible to install the Appium server software on the same host as the Leapwork controller, it is not recommended.
The hostname can be found in Settings → General → About. The IP address can be found in Settings → Network. Select the active network connection and click Properties.
How to obtain the Hostname and IP address for a Windows- based host:
The hostname for Windows host can be obtained from Settings → System. The IP address can be found by selecting Settings → Network and Internet and choosing Properties in the top.
Enter the port configured in Appium in the Port field. The default port for Appium is 4723.
Enter the path in the Path filed. (e.g., /wd/hub)
Click the Test connection button to test the connection.
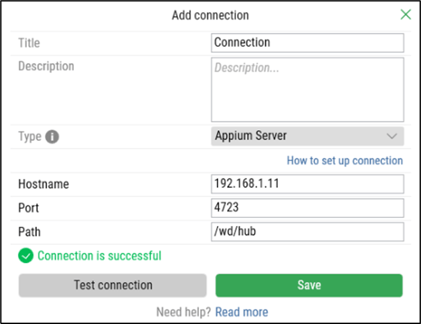
Click the Save button to save the details. Once your connection is saved a success message appears to let you know the connection is successful.
To the right of the Add button, use the buttons Edit or Delete to change and remove the connection.
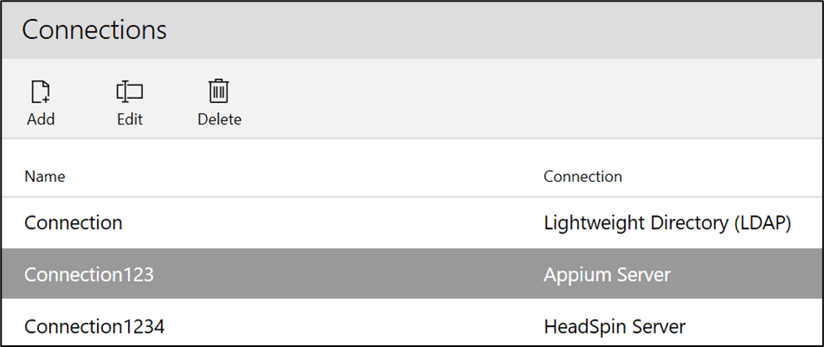
Note: This feature can be accessed by Leapwork Admin only.
HeadSpin Server is a cloud-based automation framework that is used for testing mobile applications. It drives real Android and iOS app using WebDriver. The benefit from using HeadSpin compared to local Appium server is that you do not need to own and manage any devices locally. They are all available at HeadSpin, both for iOS and Android.
Note: A separate HeadSpin subscription is required in order to use this connection type.
To add a connection, click the Add button and the following pop-up appears:
On the Add Connection pop-up window:
Enter the title in the Title field. It should be unique.
Enter the description in the Description field.
From the Type drop-down, select the HeadSpin Server option:
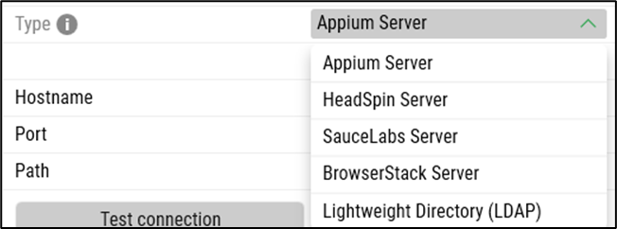
Select HeadSpin Server and the following new fields appear:
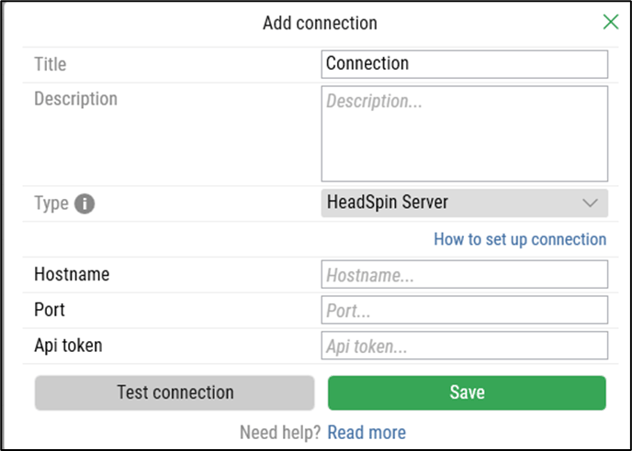
Enter Hostname in the Hostname field.
Enter the port configured in HeadSpin in the Port field.
Enter the API token in the API token filed. The token is provided by HeadSpin.
Click the Test connection button to test the connection.
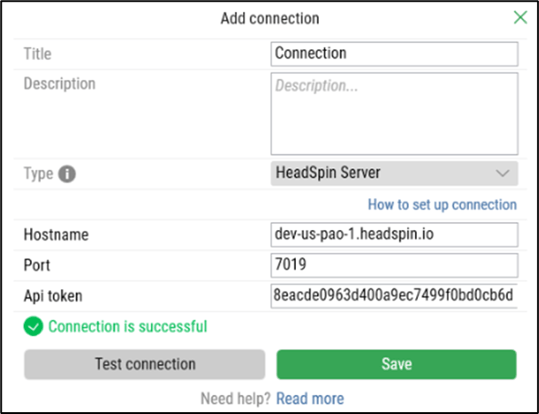
Click the Save button to save the details. Once your connection is saved a success message appears to let you know the connection is successful.
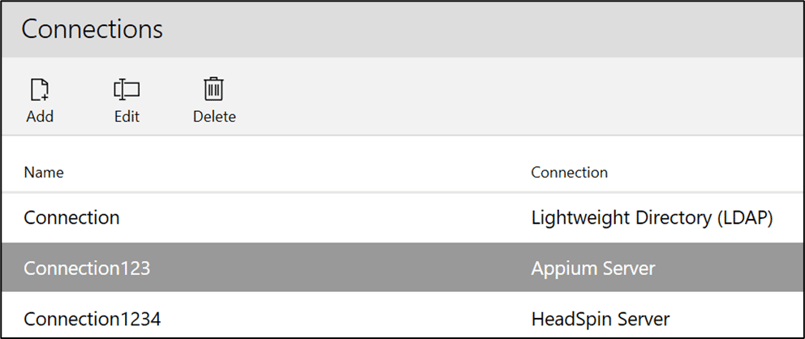
To the right of the Add button, use the buttons Edit or Delete to change and remove the connection:
Note: This feature can be accessed by Leapwork Admin only.
Lightweight Directory Access Protocol (LDAP) is a protocol for connecting to a directory service and it is used for accessing and maintaining user information. Organizations may have customized user directories which follow LDAP protocol. This feature will support such a customized user directory so that users/groups can be added to Leapwork.
The Connections tab lets you set up a connection to the LDAP server which can be used to identify users or groups in an LDAP directory.
Note:
Leapwork users can only use one directory at a time and cannot switch between Active Directory (AD) and LDAP.
Leapwork does not support adding AD users or groups and then adding LDAP users or groups.
Existing AD users or groups will be deleted if a user switches from AD to LDAP and vice versa.
To add a connection, click the Add button and the following pop-up appears:
On the Add Connection pop-up window:
Enter the title in the Title field. It should be unique.
Enter the description in the Description field.
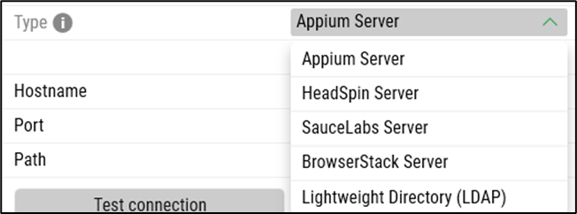
From the Type drop-down, select the Lightweight Directory (LDAP) option:
Select LDAP and the following new fields appear:-png.png?width=400&height=546&name=imagen%20(4)-png.png)
Enter the mandatory attributes LDAP Server, Port, Bind DN or User, and Bind Password. These attributes are used to connect the LDAP server.
Note: For optimal performance, we recommend to use port 389.
All other attributes are optional, and users can choose attributes based on their requirements:
Note 1: Customers must configure LDAP over SSL, including certificate installation. Verify the connection using any appropriate tool.
Note 2: For optimal performance, we recommend to use port 636.
Click the Test connection button to test the connection.
Click the Save button to save the details. Once your connection is saved a success message appears to let you know the connection was successful.
To the right of the Add button, use the buttons Edit or Delete to change and remove the connection.

Note: This feature can be accessed by Leapwork Admin only.
To add an LDAP user, from Settings, go to User Management.
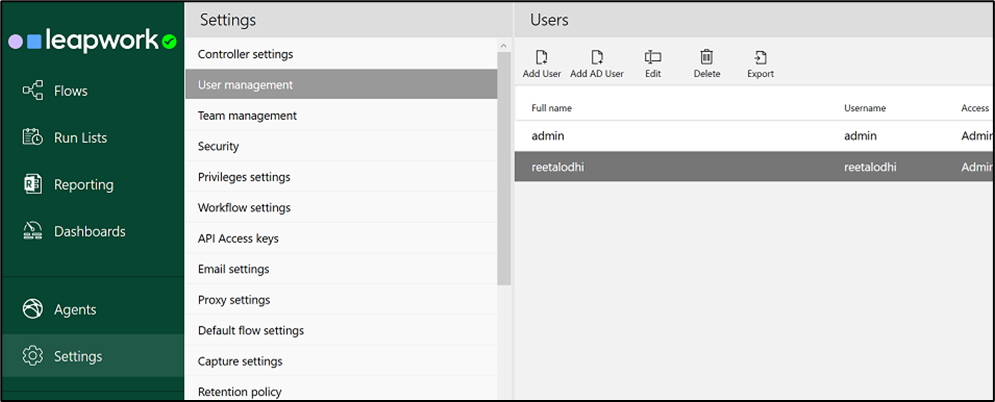
Click on Add AD User and a new window opens:
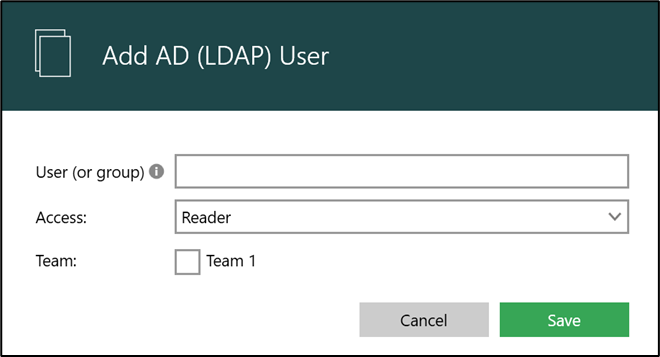
Enter the User or Group name which should be used to authorize the user or group in the LDAP directory.
Select Access from the drop-down menu.
Check the Team checkbox based on your requirements. (Note: The Team checkbox is only available for Leapwork Enterprise Edition users).
Click Save to save the User or Group.
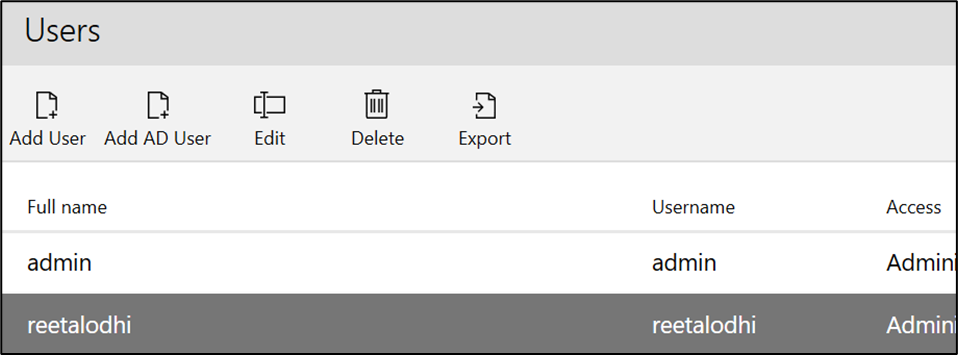
To the right of the Add AD User button, use the buttons Edit, Delete and Export to change or remove user profiles or to export them in an Excel format.
Saucelabs Server is a cloud-based platform for testing mobile applications on emulators (Android); simulators (iOS); and real iOS or Android devices. The SauceLabs server must be installed on a host that is accessible for Leapwork.
To add a connection, click the Add button and the following pop-up appears:
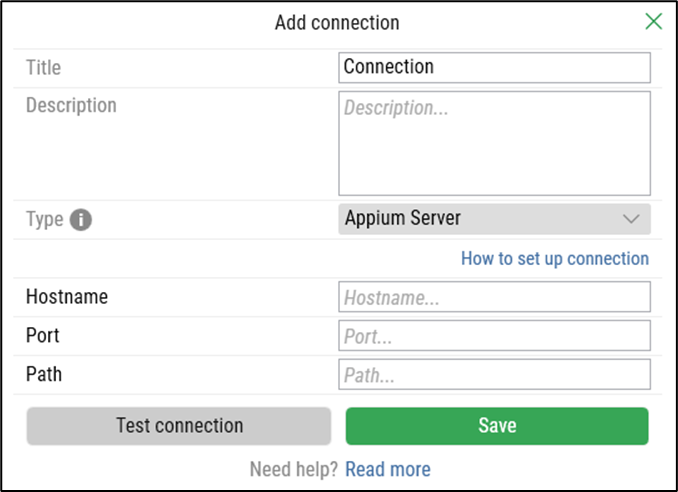
On the Add Connection pop-up window:
Enter the title of the connection in the Title field. It should be unique.
Enter the description in the Description field.
From the Type drop-down, select the SauceLabs Server option:
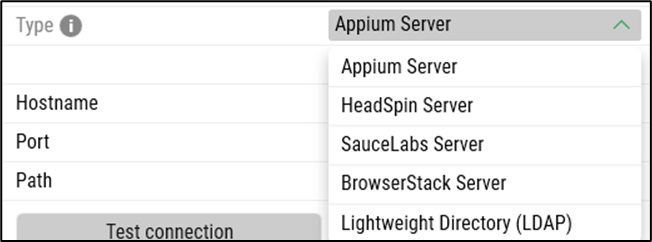
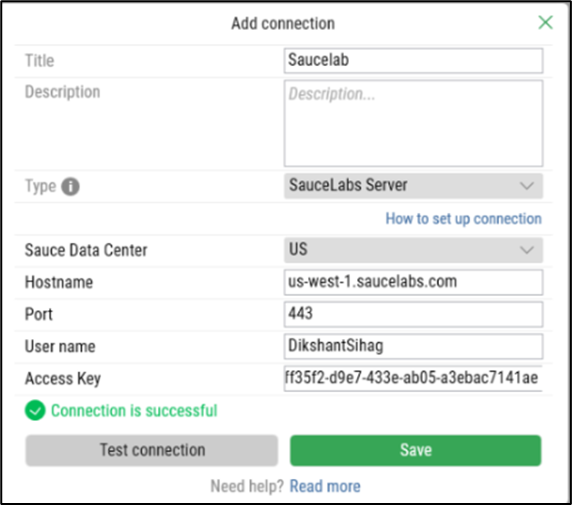
Select SauceLabs Server and the following new fields appear:
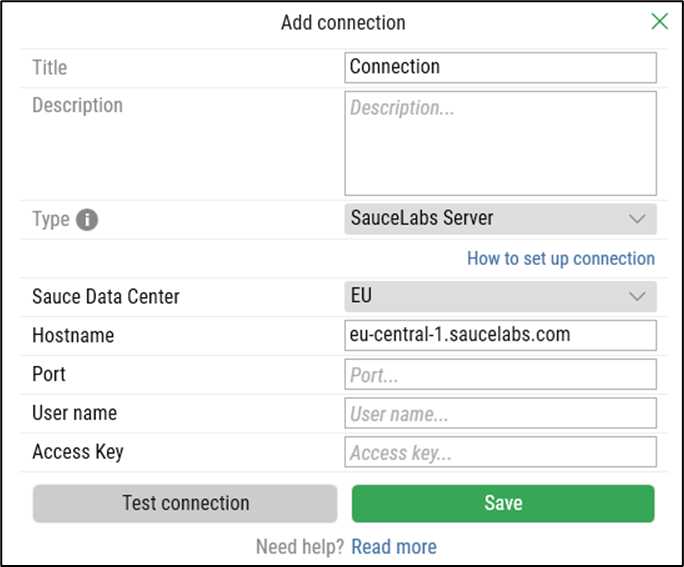
Select Sauce Data Center from the drop-down list.
Enter hostname in the Hostname field.
Enter port in the Port field.
Enter the user name in User name filed.
Enter the access key in the Access Key field.
Click the Test connection button to test the connection.
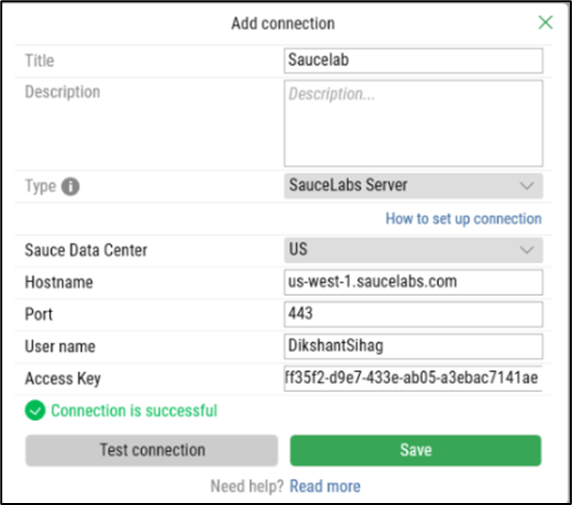
Click the Save button to save the details. Once your connection is saved a success message appears to let you know the connection is successful.
To the right of the Add button, use the buttons Edit or Delete to change and remove the connection.
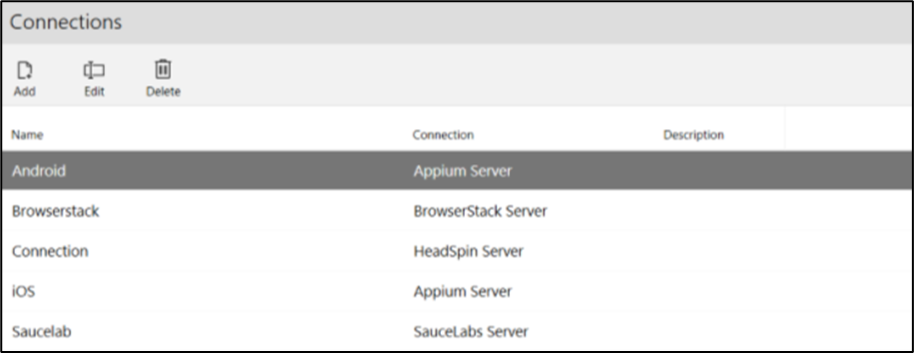
Note: This feature can be accessed by Leapwork Admin only.
BrowserStack is a cloud-based platform for testing mobile applications on emulators (Android); simulators (iOS); and real iOS or Android devices. The BrowserStack server must be installed on a host that is accessible for Leapwork.
To add a connection, click the Add button and the following pop-up appears:
On the Add Connection pop-up window:
Enter the title of the connection in the Title field. It should be unique.
Enter the description in the Description field.
From the Type drop-down, select the BrowserStack Server option:
Select BrowserStack Server and the following new fields appear:
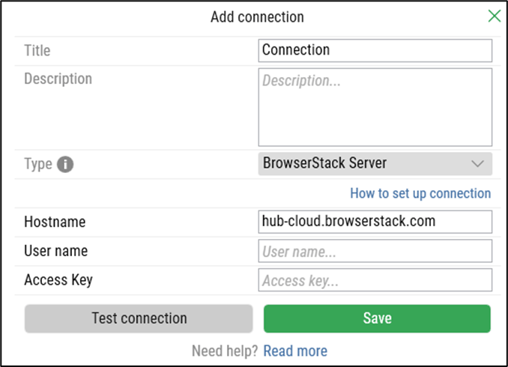
Enter Hostname in the Hostname field.
Enter the user name in User name filed.
Enter the access key in the Access Key field.
Click the Test connection button to test the connection:
Click the Save button to save the details. Once your connection is saved a success message appears to let you know the connection is successful.
To the right of the Add button, use the buttons Edit or Delete to change and remove the connection:
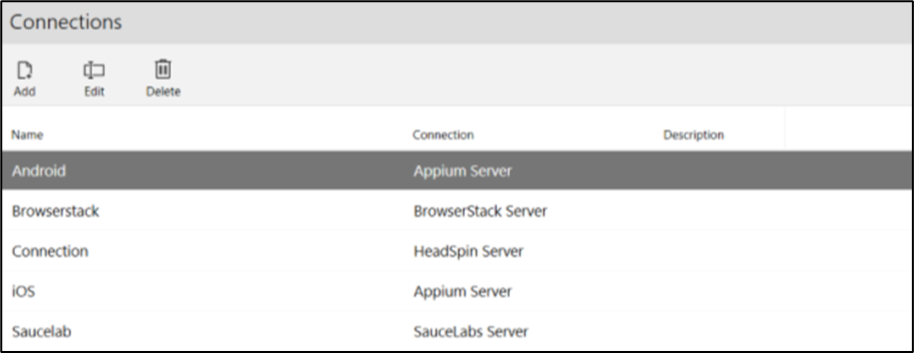
Azure Active Directory
Azure Active Directory is a cloud-based identity and access management service provided by Microsoft Azure. It serves as a comprehensive solution for managing user identities, securing access to resources, and enabling single sign-on across various cloud applications and services.
Add Connection:
To add a connection, click the Add button and the following pop-up appears:
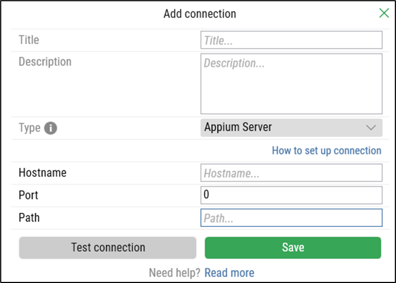
On the Add Connection pop-up window:
Enter the title of the connection in the Title field. It should be unique.
Enter the description in the Description field.
From the Type drop-down, select the Azure Active Directory option:
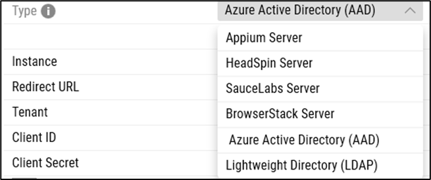
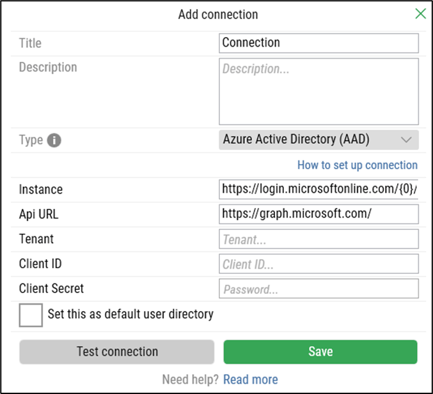
Once you select Azure Active Directory following new fields appear:
Note: To complete the Add Connection process, follow the next steps in the Azure portal (https://portal.azure.com/).
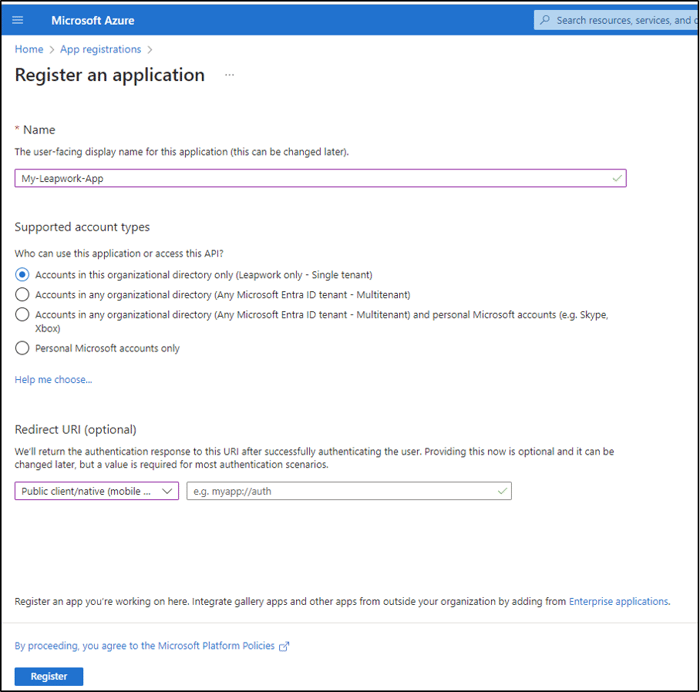
Click the App Registration to create a new app registration.
Enter the name in the Name field.
Select the users from the Supported Account Types options.
Click Register button.
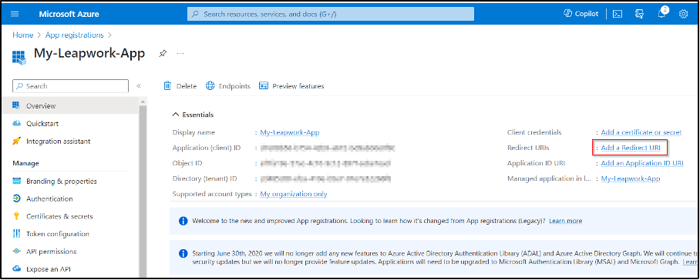
On the Overview Section window of the new application:
Click the Add a Redirect URI hyperlink.
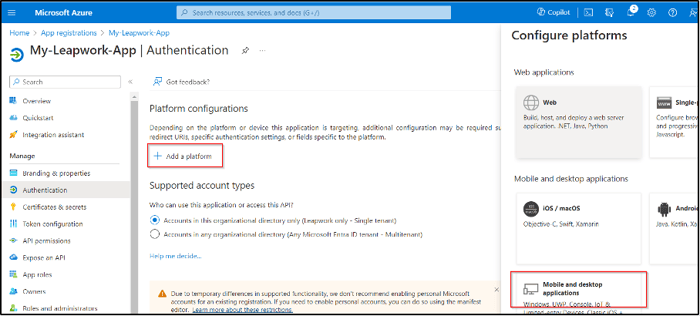
Click the Add a Platform option.
Click Mobile and Desktop Applications button in Configure platforms field.
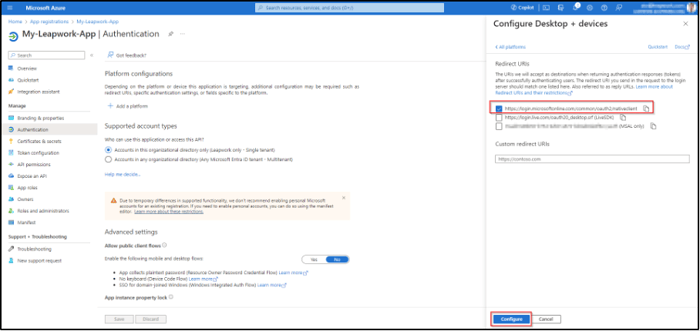
Select the https://login.microsoftonline.com/common/oauth2/nativeclient checkbox.
Click Configure button.
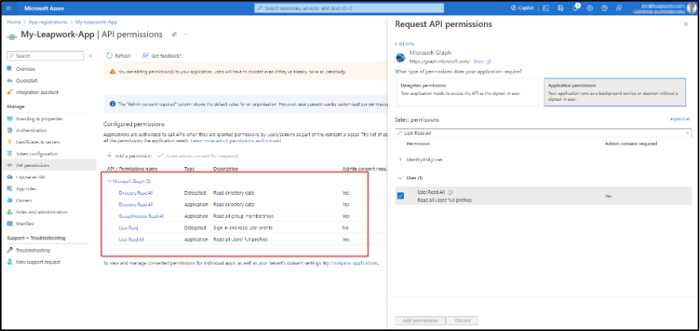
On the API Permissions section:
Click Add a Permission button.
Select Microsoft Graph option.
Select Application Permissions button.
Select “User.Read.All”, “Directory.Read.All”, and “GroupMember.Read.All” in the Users checkbox.
Select Delegate Permissions button.
Add “Directory.Read.All”, and “User.Read” in the Users checkbox.
Click the Add Permissions button.
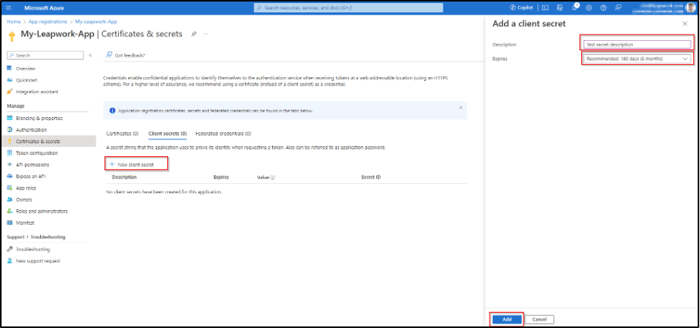
On the Certificates & Secrets section:
Click Next Client Server button.
Write a description in the Description field.
Select an expiration date from the Expiration dropdown.
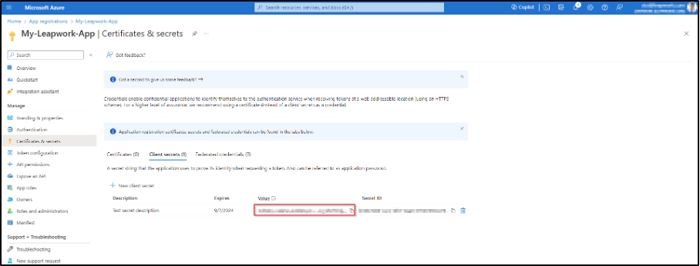
Securely store the Secret Value for backup.
Note: Please allow 5-10 minutes for the app registration changes to take effect. You may now proceed with the Add Connection process.
The Instance and API URL fields are automatically filled for Azure Active Directory (AAD).
Enter the tenant in Tenant field.
Enter the client id in Client ID field.
Enter the client secret in the Client Secret field.
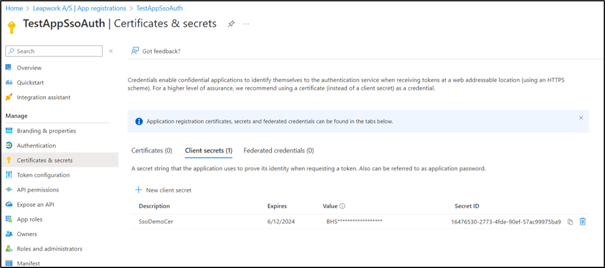
Note: The Tenant and Client ID are found in the Overview section of the application that has already been registered on the Microsoft Azure Portal. (https://portal.azure.com/#home)

The Client Secret is generated from the Certificates & secrets section:
Note: For more information about registering app in Microsoft Azure Portal please visit: https://learn.microsoft.com/en-us/azure/active-directory/develop/quickstart-register-app.
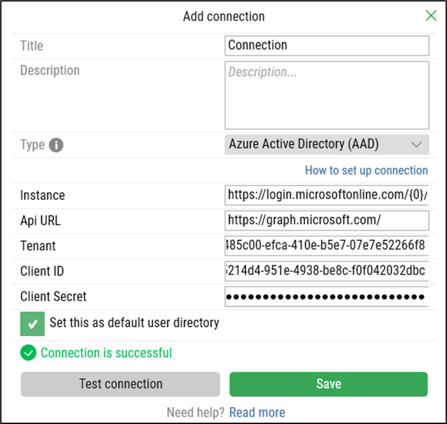
Click the Test connection button to test the connection. The embedded browser will open. Enter the username and password. Click Ok to test the connection.
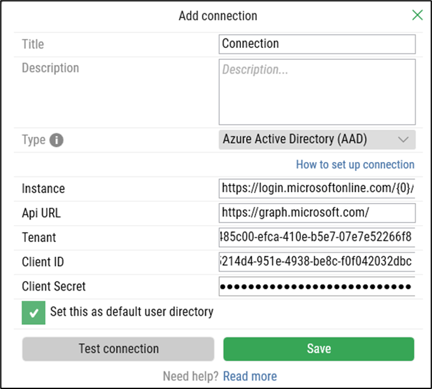
Check the Set this as default user directory checkbox. Once your connection is tested a success message appears to let you know the connection is tested successfully.
Click the Save button to save the details. Once you click on Save button the pop-up will appear, select Save & Continue to proceed.
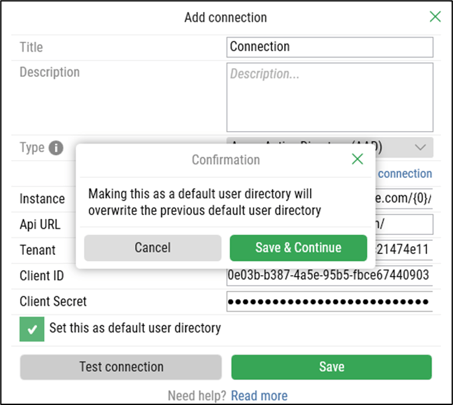
Once the connection is successfully saved, it would be added to the connections list.
To the right of the Add button, use the buttons Edit or Delete to change and remove the connection.

Note: This feature can be accessed by Leapwork Admin only.
©2024, Leapwork. All rights reserved.