Introduction
To get an overview of the components of the Leapwork Automation Platform, see Architecture Overview.
Due to company reasons, it is sometimes necessary to install and activate on a completely offline system.
Offline Installation Guide
To start the offline installation, follow the steps below:
- On an online computer, download the latest release from the Releases page.
- Save and transfer the file to the offline computer
- Navigate to the location of the MSI file and double-click the .msi file to start the installation.
- Click the Next button to begin the installation

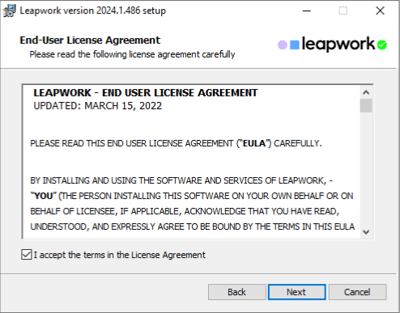
- Read the end user agreement, select the I accept the terms in the license agreement checkbox, and click the Next button.
- Click the dropdown menu to select the components you want to install and click the Next button. Refer to Working with Leapwork for more information.
Note: For trial purposes, keep the default selection (all three components).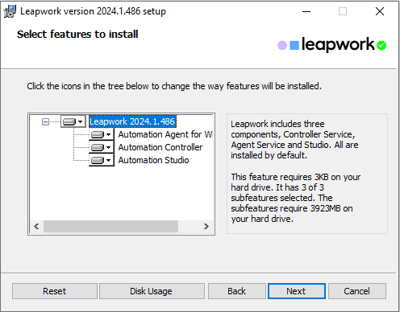
The Configuration screen includes settings for multiple components. Settings can later be modified in the configuration files for each component: studio\studio.config, controller\controller.config, and agent\agent.config. The installation directory: C:\program files\LEAPWORK contains these files. - If you are installing the software for the first time, select New Configuration and click the Next button.
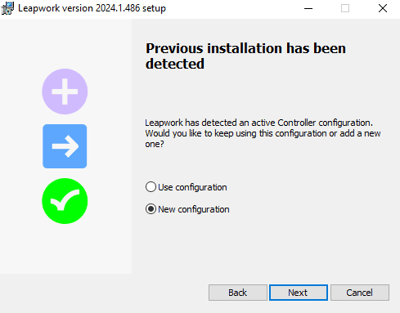
- If you have a previous version installed, click Use Configuration, then click the Next button and move to step 10 of this guide.

- Enter the license key and click the Next button.

- Since the process occurs on an offline PC, an offline connectivity issue will appear. Click the Activate your license offline button.

- Click the Generate REQ file button. A Save As window will open to store the REQ file in the local system.

- Transfer the REQ file to the online PC.
- Go to License Section in the Client Portal.
- Click Offline License activation link.
- Upload the REQ file in the Offline license activation window.

- Click Download LIC file button. The LIC file will be saved in the local system.

- Transfer the LIC file to the offline PC.
- In the Installation process window, click the Upload LIC file button.
- Select the new LIC file.

- Click the Next button.
- Enter the port codes for the automation controller and the automation controller API.
Controller Port: Studio and the Controller make API calls using a TCP port. The default is port 9000, you can change to any other port number that is not in use by other software on your computer.
Note: We do not recommend changing the Controller, Controller API or Agent port numbers.
Controller API Port: For integration, access Leapwork's open REST API using the port number set here. The default port is 9001. You can change to any other port number that is not in use by other software on your computer.
Note: We do not recommend changing the Controller, Controller API, or Agent port numbers.
Add Exceptions for the Controller in Windows Firewall: Select this option to add a rule to the Windows Firewall to permit all incoming connections to the Controller.
Note: The password is optional. The Leapwork Automation Platform is used in corporate and secured test networks.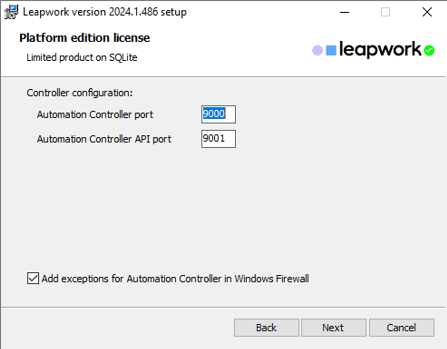
- Specify the paths for both assets and video.
Path to Assets: This is the path to the file system folder which contains the encrypted SQLite database files holding all Leapwork assets, automation flows, schedules, and run results.
WARNING: SAVE THE DATABASE ENCRYPTION KEY. It protects the database files created during the upgrade and enables the Controller to access them. The key is necessary if the Controller needs to be moved to a new machine or to restore the Leapwork system. Store the key in a secure and safe place.
- Specify a password for the default user (Admin) and click the Next button. Use the admin user in Studio after the installation.
Note: The admin password is securely located in your local installation. In case you forget it, Leapwork cannot assist in retrieving the password.
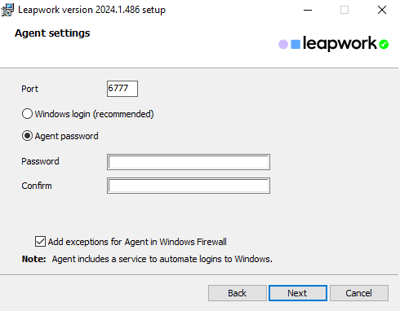
Adjust the settings on the configuration screen before completing the installation. Leapwork Agents can log into Windows automatically, removing the need for the user to be logged in to run a flow. It also supports testing Single Sign-on between Windows and other applications. - Select either Windows login or set a password, which is blank by default, and click the Next button.
Agent Port: Automation flows operate within the Agent, which communicates with Studio and the Controller via a closed remote-control protocol on a designated TCP port. The default port is 6777, but this can be changed to any other unused port.
WARNING: IT IS ADVISED NOT TO CHANGE THE CONTROLLER, CONTROLLER API, OR AGENT PORT NUMBERS UNLESS ABSOLUTELY NECESSARY.
Agent Password: Because the Agent uses a remote-control protocol, it is advised to set a password to prevent unauthorized access.
Note: Leapwork Agent passwords will begin deprecation and are expected to be removed from the product before the end of the year.
Add Exceptions for the Agent in Windows Firewall: A check in this box will direct the installation process to add a rule to the Windows Firewall to permit all incoming connections to the Agent.
- Click the Install button.

- After the installation is complete, click the Skip button.

- Click the Finish button to exit the installer.
 Note: If there is an existing distributed setup of Leapwork, repeat the installation guide for each Leapwork component and machine in the environment.
Offline Activation Guide
If you already have the software installed but need to perform offline activation, follow these steps:
- Start Leapwork Studio:
- After installing all Leapwork components, start Leapwork Studio. The Controller will broadcast its IP address, so Studio usually knows its location on the first start.
- Log in as admin, Studio will prompt you to enter the license key.

- Get the license key:
- On a PC with an internet connection, go to the Client Portal.
- Copy the license key from the portal.
- On the offline PC, enter the license key in the box. This will prompt a message to inform of an offline connection and give the option to offline activation.

- Offline activation:
- Click Activate your license offline link.
- Click Generate REQ file button. A Save As window will open to store the REQ file in the local system.

- Transfer the REQ file to the online PC.
- Go to License Section in the Client Portal.
- Click the Offline License activation link.
- Upload the REQ file in the Offline license activation window.
- Click Download LIC file button. The LIC file will be downloaded to the local system.
- Transfer the LIC file to the offline PC.
- In the License Management process window, click Upload LIC file button.
- Select the new LIC file.
- Click the Validate button.
